

Enabling AWS Config
Posted on Aug 13, 2020 by Shree Vishnu P


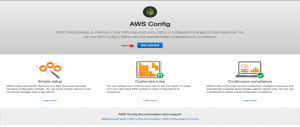
About AWS Config
AWS Config provides a detailed view of the configuration of AWS resources in your AWS account. This includes how the resources are related to one another and how they were configured in the past, so that you can see how the configurations and relationships change over time and also track the changes.
Why AWS Config?
AWS Config helps organizations meet many of the compliance requirements for PCI-DSS, HIPAA, etc. AWS Config continuously monitors and records configurations and allows you to automate the evaluation against desired configurations. For example, you can automatically validate if all your S3 buckets are private with two managed rules called “s3-bucket-public-write-prohibited” and “s3-bucket-public-read-prohibited”.This will make sure that your S3 buckets remains private all the time and are capable if reverting to private with the help of an extended lambda function.
Configuring AWS Config
In AWS Config, there are multiple rules which can be enabled for different services and compliance. For this example, we will show you how to enable config check for RDS Public access check. This rule checks whether the Amazon Relational Database Service (RDS) instances are not publicly accessible. Step 1: Once you get into AWS config from the Services dropdown, you will be welcomed by the Service Welcome page. Click on Get Started.
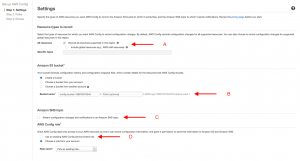
Step 2: Here we need to enable multiple options to get started with AWS Config for the first time.
A) To get started with AWS Config, enable the Recorder and make sure to check the checkbox for Global resources as well. The latter is required to track IAM and CloudFront like global services B) To enable log streams to an S3 bucket, you can either allow the AWS to create a new bucket for you or you can select from your existing bucket list. C) Enable SNS for config changes: Doing this will start pushing notifications for every poll and also increase your SNS cost so it’s better to avoid doing so. D) AWS Config will require read-only access to the services for the purpose of monitoring, If you have any existing role, you can use it. Otherwise, AWS will create a role for you.
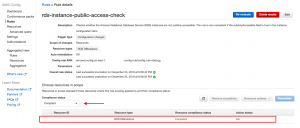
Step 3: Enable the actual RDS rule. As mentioned earlier, there are multiple rules for multiple services. Each service will also have multiple rules for different use cases. Here we are enabling a rule named “rds-instance-public-access-check”. Search for RDS in the search bar, select the mentioned rule, and click Next. 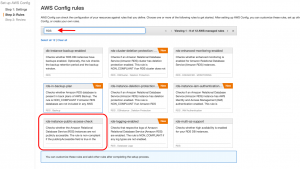
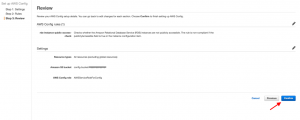
Step 4: Under the Review tab, once you finish your review, click on Confirm to activate the rule.
Step 5: A few minutes after AWS Config has collected this information, you should be able to see the results of compliant and non-compliant resources under the rules you have configured.
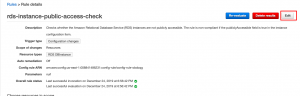
Step 6: Choose the remediation action. In our case, we have chosen to public a SNS for detected changed, . Here, you can also select multiple other actions such as creating a Jira Issue or triggering a lambda function for a custom action. Check the Edit option in your rule which will open a new age where you can fine Choose a remediation action as shown in the image below.

Pricing
You will be charged $0.003 per configuration item recorded in your AWS account per AWS Region. For more detailed pricing information, please refer to this page.