

Execute AWS Lambda locally in Pycharm and Deploy to AWS
Posted on Jun 17, 2020 by Govind Kumar


Well, as a software developer we generally prefer to use the tool of our own choice while coding. The priority varies from developer to developer. Some directly starts with the terminal while others do with the IDEs. The Development is required everywhere and the earnestness of Serverless technology can’t be ignored where also development plays a crucial role. One among them is AWS Lambda, It’s fun automating the stuff using Lambda but it becomes challenging when we need to do it online via the AWS console. In order to get rid of that muddle, let’s frame-up the environment where we get the same feel without compromising our interest, i.e. Coding from our favourite IDEs on the local computer.
This recipe will provide a modus operandi to set up and manage the configurations of PyCharm in a local development environment, and how you can go ahead and deploy your first Python serverless function directly to AWS Lambda. Believe me, it's fun!!
I am using macOS Catalina. The setup is going to remain indistinguishable in almost all the macOS. However, the instructions to do the same in all other OS is also mentioned.
Here are the steps to setup PyCharm locally:
1. In order to achieve our target, there are certain application pre-requisites.
- Ensure that Python is installed in your system. If not, click here to download the Python version of your choice. (Preferably Python 3.X)
- Check if everything is in order using the below command from the terminal.
python --version# Python 3.7.3.2. Install the AWS Serverless Application Model (SAM) command-line interface using brew. (Windows Users can try this).
Before Installing Brew there are few prerequisites. To complete that click here
After the successful installation of Brew checks the version.
Note: Brew (It is not required in Windows or Linux OS)
brew --version
The output should look like this:
Homebrew 2.1.6Homebrew/homebrew-core (git revision ef21; last commit 2019-06-19)
Let’s install SAM CLI now.
brew tap aws/tapbrew install aws-sam-cli
To upgrade the AWS SAM CLI, you still use Homebrew, but replace install with upgrade as follows:
brew upgrade aws-sam-cli3. In order to run the Lambda function locally, we will be needing a docker container. Let us install docker .
brew cask install dockeropen /Applications/Docker.appWindows and Linux based user can follow this link to get docker installed in their system.
As soon as docker has been launched, check if it is running:
docker ps4. Once done with the above steps, let’s install the IDE of our choice. Here in this case Pycharm. (You can make use of another tool like Visual Studios as well).
Follow this link to install Pycharm. You may install the package as per the requirement. Here we are installing the community edition.
5. Let us start the installation of a toolkit and set up the project structure.
Steps: Navigate to Pycharm preferences > Plugins > Marketplace > Search Plugin in marketplace > Search for AWS Toolkit and Install it.
Note: The way to install a plugin in windows and Linux may be different. You may click here to get it done in your system.
- Once done, restart Pycharm to get the plugin into action.
6. Setup the Project in Pycharm.
Let’s set up your project in PyCharm. Create a new project from File > Create new project and choose AWS Serverless Application as project type. Be sure to select the correct setting (you can choose a “Hello World” template from SAM Template).
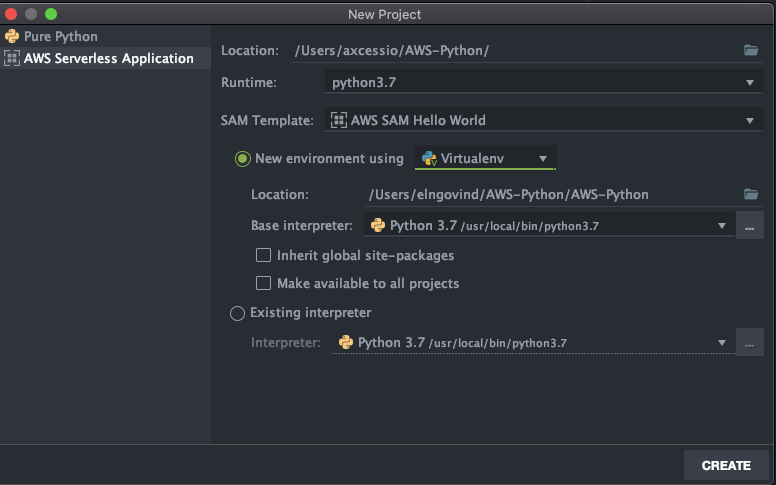
The project setup will be done automatically, and a function called lambda_handler, which returns a basic ,Hello World“ example, will be created in app.py.
7. The directory structure will be like this:
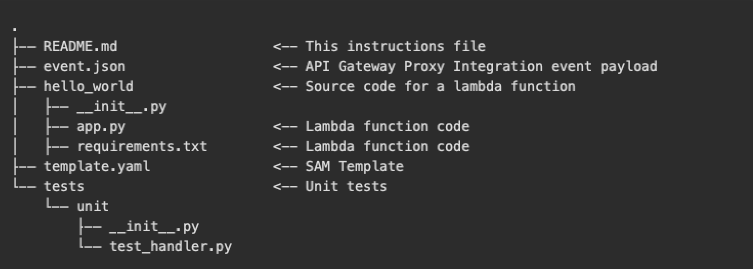
Note that, there are two files of major concern in our case right now. i). app.py ii). template.yaml
Click on app.py file and write some sample lambda function. You may simply copy paste this as well or take the default created.
import jsondef lambda_handler(event, context):return {"statusCode": 200,"body": json.dumps({"message": "hello world",}),}
8. Now ensure that you have your Correct AWS credentials configured in your system.
To install AWS CLI in Mac — Click here Windows — Click here Linux — Click here
Once, installed, configure using the credentials, generated using IAM Service. To configure AWS CLI click here.
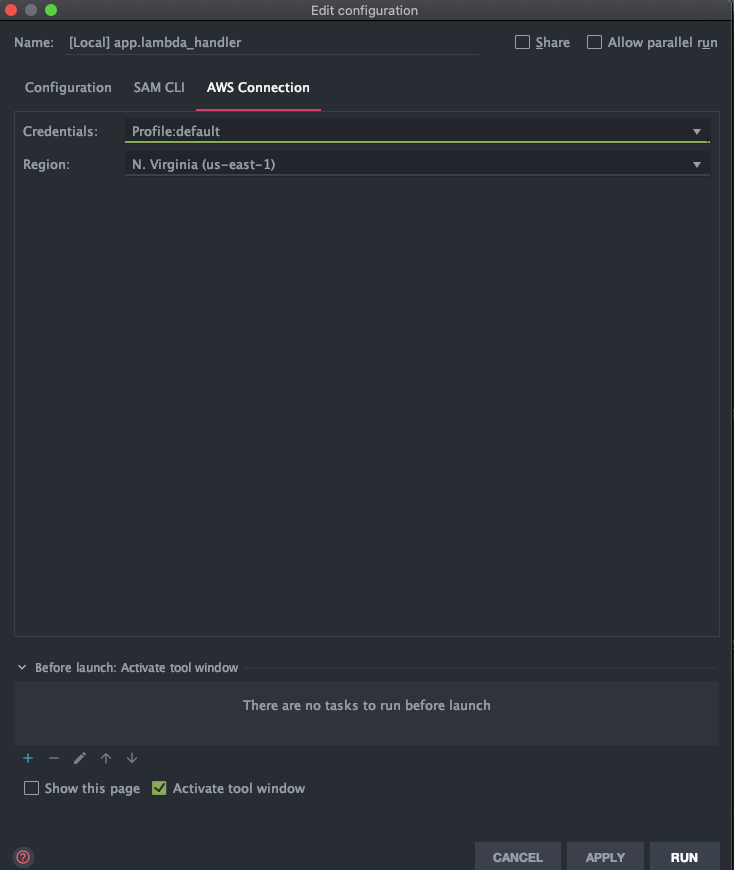
9. Configure Pycharm to connect to your AWS account. Click on AWS Connection and Select the credentials along with the region.
10. Once done, Select the JSON Input to trigger the lambda function. You may select Hello World Template or can write your own input file.
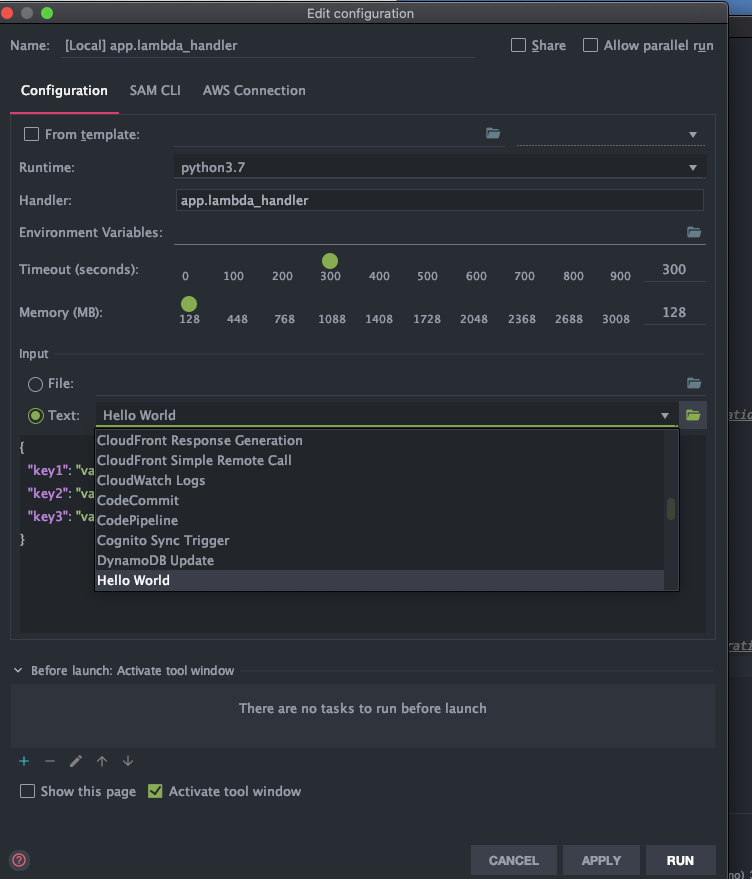 Selecting the Input Json for Lambda Function
11. Test the function locally now!! Simply go to your function and click on Run.
 Run Lambda Locally
Now it will take a while, as it will download the Docker Container for the first time. Once done, something like this will appear!
 Output after execution
12. You’ll need to create an AWS CloudFormation stack and Amazon S3 Bucket (if needed) in order to proceed with the deployment.
In order to deploy your function to AWS Lambda, you can right-click on your project folder in the sidebar, and choose Deploy Serverless Application:
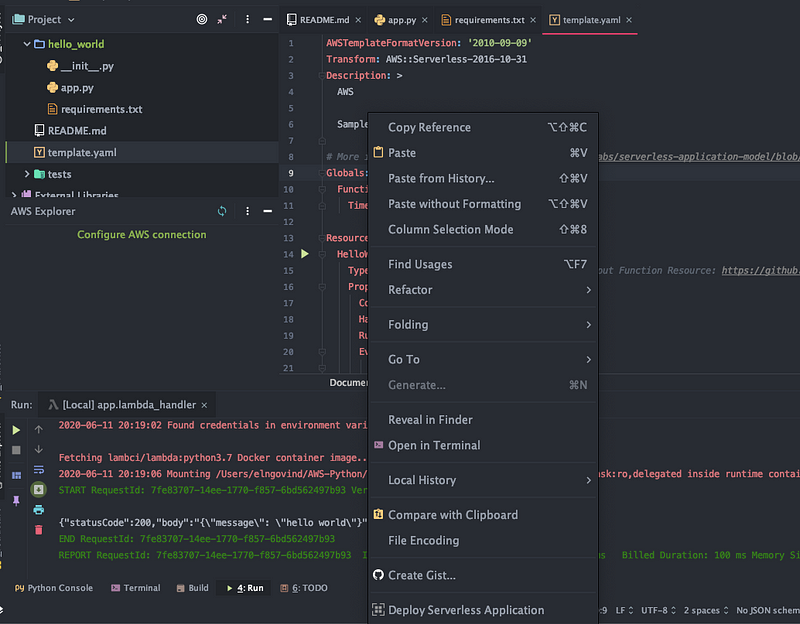 The deployment will go live in a short while!
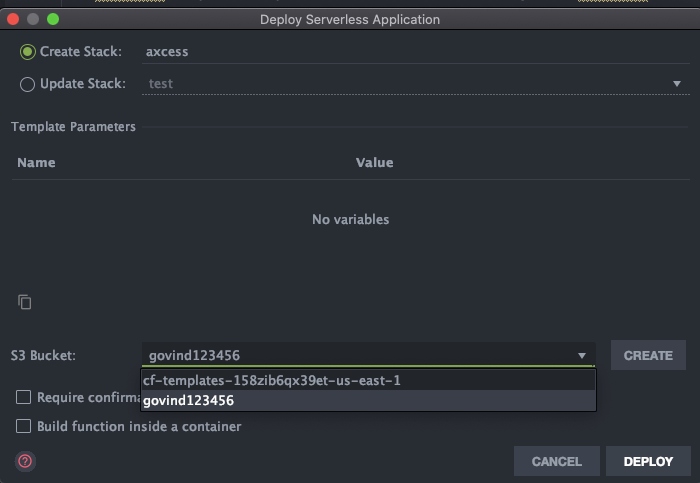
Give some name for the Cloudformation Stack and Select the S3 Bucket.
Now, you’ve successfully set up PyCharm with AWS toolkit to test your functions locally, subsequently deploy it live to AWS Lambda (via AWS CloudFormation).
Note: Feel free to reach us via a comment in case of any issue, we will solve it together.